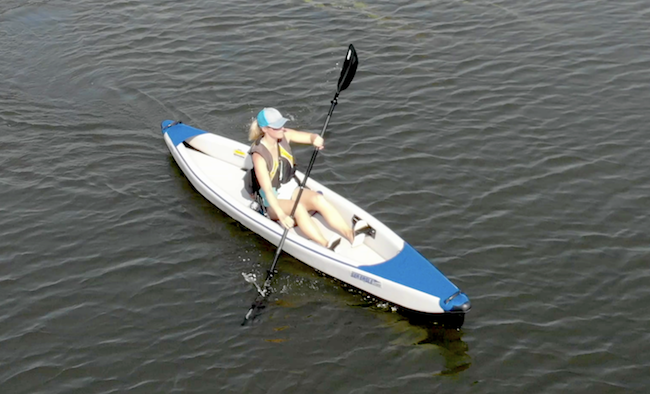
The one thing that is often missing on an inflatable kayak is a foot rest. Sea Eagle has come out with a fantastic new Flexbrace Footrest that comes standard now on their 393rl Razorlite kayak and on their 350fx fishing kayak.
Many will be happy to know that the Flexbrace Footrest can now be purchased separately as well. If you have an older Razorlite model or even a different model all together then you can add the Flexbrace by gluing it to the inner sides of your inflatable kayak.
I have been paddling inflatable kayaks for over a decade now and I’ve tried several different foot rest options over the years and non have been perfect.
More often than not I would just place a packed dry bag up front so that I could press my feet against it. It wasn’t the most ideal option but it was better than nothing.
The Flexbrace is more functional and feels better to use than any other footrest I have tried.

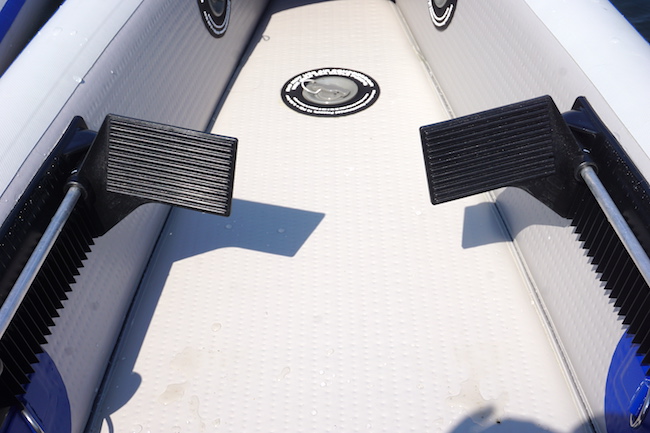
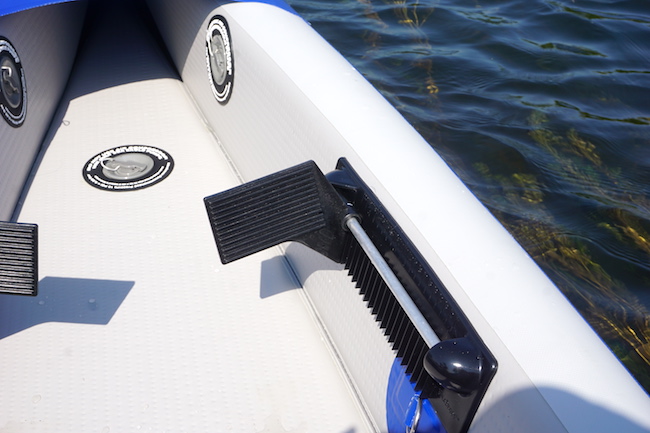
It is a proper ergonomic footrest that can be adjusted to 20 positions so you can easily customize it based on your height.
Besides an increase in my overall comfort level I have definitely found that by bracing my feet on the footrest I can get a far more powerful paddling stroke and consequently move much faster. The difference is very noticeable.
You can easily adjust the position of the footrest from a seated position by lifting the pedal with your foot and sliding it into the right groove.
Once the brace locks into the desired groove it stays put and allows you to press your weight into it when paddling.

Installing the Flexbrace
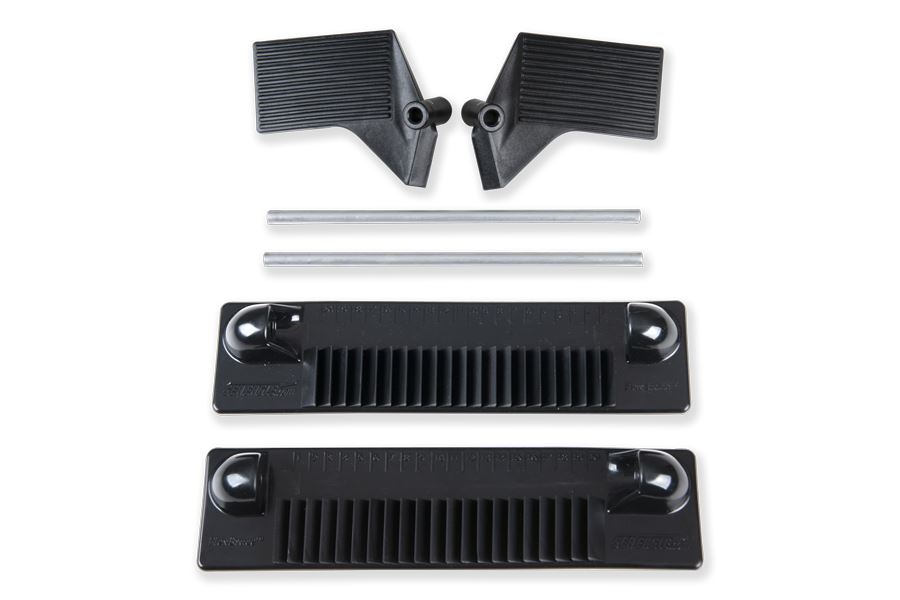
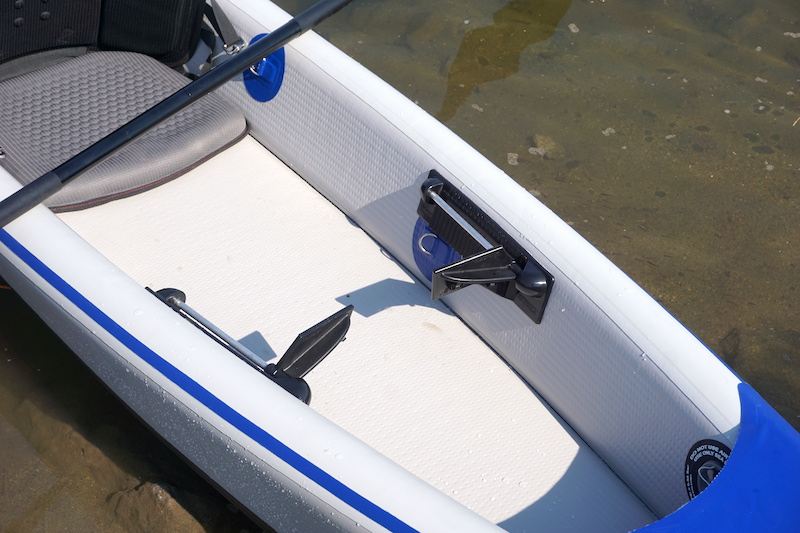
Included in the kit is 2 Flexbraces and 1 Weaver Two-Part Glue Kit. You will need to glue a Flexbrace on each inner side of your kayak.
You can secure the foot pedal to the metal rod then insert the metal rod into the Flexbrace before gluing the Flexbrace onto your kayak.
The metal rod and foot brace can be removed at any time but the Flexbrace will stay glued to the sides of your kayak.

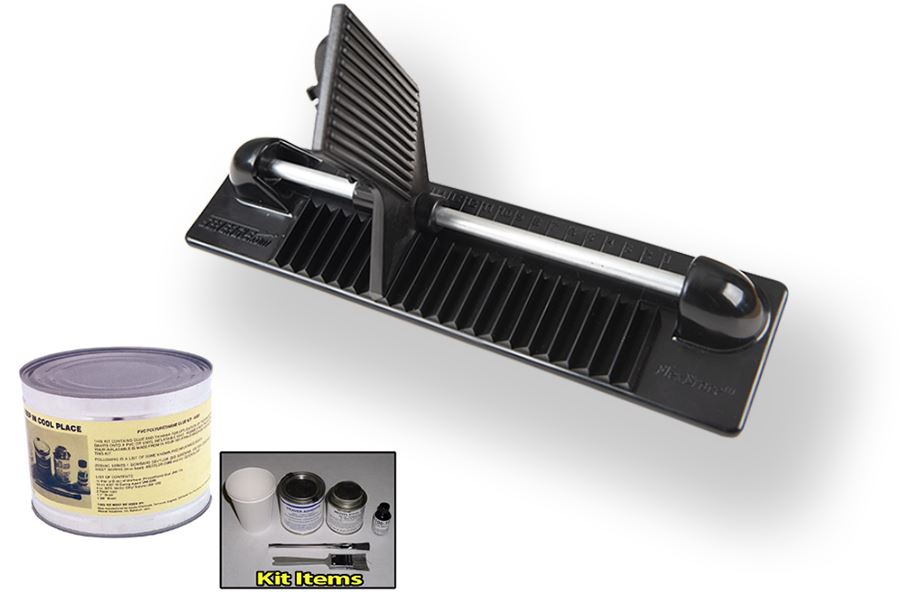
The glue will come with instructions but here is the process I followed to attach the Flexbrace Footrests:
1. Inflate your kayak.
2. Clean the kayak surface area where you will be placing the Flexbrace first with a gentle cleaner, rinse and let dry completely.
3. Sit in the kayak seat and measure how far out your feet sit and what is a comfortable position for your legs when paddling.
Lightly mark the area where you want to glue the Flexbrace with a marker to avoid gluing errors – you don’t have to do this but I found that it helped.
Make sure you get the same measurements on each side so they are in the same position.
4. Follow the instructions on the glue to mix the curing agent to the adhesive.
5. Coat the back of the Flexbrace as well as the marked area on your kayak with a thin coat of glue and place the lid back on the can.
6. Leave it for half an hour then apply a coat of the adhesive to each surface again and allow 5 minutes for it to dry.
7. Then reapply another thin coat to each surface and place the Flexbrace on the marked area on the kayak.
8. Press firmly. At this point if you wish you can deflate your kayak so that you can press firmly on the back of the Flexbrace.
9. Allow to set for at least 48 hours.
Despite all these steps the process isn’t hard at all and the glue works great.

A couple things to be aware of before purchasing this kit:
1. The Flexbraces can’t be used with the Sea Eagle Sport kayaks and only 1 Flexbrace can be used with the Sea Eagle 385ft FastTrack because of valve placement.
2. The Flexbrace cannot be exported outside of the continental US because of the glue kit included in the package.
I highly recommend this footrest especially if you are paddling any longer distances. I found it to be very functional and useful as well as easy to customize for your size and comfort.
I definitely prefer paddling with it rather than without and am very happy to see it included in the newer Razorlite models.
If you have an older Razorlite or another inflatable kayak that is made with durable PVC material you can find the best deal on the Flexbrace Footrest at SeaEagle.com and attach it yourself. In my opinion totally worth it!


I have found that if I can insert the rod into the one of plastic holders and then bend the other plastic holder so that the other end of the rod will slot in, then if I stand on the rod there is sufficient force to make it do so. I am leaving them in and folding the boat into a looser shape as it is proving a pain to reverse the process. It does seem like poor design or manufacturing. Does anyone know if the previous foot rest for the sea-eagle is still available so that a double 437rl can be used as a single with the seat in the middle of the kayak? Thanks.
First time setting it up in my living room. Easy to setup and inflate.
Didn’t install the foot pedals but when I tried to snap the rods into the storage clips on the back of each pedal the clips broke right off. Poor design.
Getting everything back in the bag was quite a chore as well. Not something I will try lake side. I’ll just fold it and put the included strap around it until I get home.
These footrests are the reason I went with the 393RL instead of the SE Airvolution–well, the footrests and the reputed speed. But dang! I didn’t think anything could be worse that inserting them. I was wrong. Extracting them is even worse–dare I say: impossible. I’m all for leaving them them in, but I’m wondering how to turn the bow and stern v-hulls so that they aren’t on top of each other and are less bulky. Is this even possible? Maybe with time and wear they’ll be a little easier to manipulate. Maybe. Also, what does everyone use to put around the footrests to prevent the sharp edges from rubbing into the deck and sides? Happy paddling, everyone!!
I have just got a 393 razorlite today, and hoping the weather will be OK on Friday for the maiden voyage on a canal. Inflated it in living room and checked it over, seems good. I’m 57 and reasonaby strong but inserting the brace rods was a major mission, taking longer than inflation, and it would take an act of sheer brute force with a lever or tool to remove them, no way can I get enough leverage by hand. I can’t imagine tangling with this after a day out paddling, so the choice is to leave them in permanently, or somehow remove them and get the other type of rest. I put the Styrofoam padding underneath the rests so folding shouldn’t do any damage. It just about goes back in the bag, but is quite untidy and no room for the other bits. Now I might change my mind about this once I have used it, but at the moment it does not feel like a premium product worth the money I paid. I think the foot brace is a design nightmare, Sea Eagle have got this so wrong.
I just got my new 393RL yesterday and I’m looking forward to taking it out on the water. I set it up in my living room just for a dry run set up. Wow! I concur with others that installing the footrests is difficult! I’m a 67 yr old woman and my hand strength isn’t what it used to be. I ended up getting a kitchen knife and using it like a shoe horn was able to slide the rear of the rod into the hole. Now I can’t get it out! I know you say you fold your kayak up with the footrests in place. I tried that but it makes the folded kayak so bulky that it barely fits in the backpack – leaving no room of the seat and pump. Suggestions?
I wish I had a suggestion to help but unfortunately I don’t. I just leave mine as a bulkier package. It still fits in the bag but it is a little bulky. I really like the footrests when paddling but agreed they are a bit tricky. Hope you’ve been enjoying your kayak!
Mine seem very sharp on the ridges, in fact there was a Styrofoam under the ridges in original packing to protect whatever is brace next to when deflated and that Styrofoam is pretty dented in. I will keep that for now and maybe file the edges away as it can not be good for any surface.
As for inserting the rods, I might drill the paddler side bit more but not through. Just to allow rod to settle deeper in the hole and appear bit shorter and easier to snap in.
Thanks for the great reviews!
Footrests work great as footrests. The placement of the rods into the bases is just plain stupid. It is harder that carrying the kayak, inflating it, or packing it back up. Sea eagle needs to redesign this, and make retrofit kits available.
I may try a rod threaded into a long rod coupling/locknut to eliminate this completely asinine design flaw.
You’re right, is very convenient as far as adjusting options, but it’s very cumbersome to set up, inserting and removing the rod is a full workout, not practical at all, it takes more time inserting and removing the rods than setting up the kayak.
Exactly! We’re going to drill out the front, slide it in from here on out, then put in a removable plug. This set up is ridiculous, and poorly designed, killing the whole easy travel vibe. 😞
If you haven’t already, drill out from the rear (end facing paddler) as pressure on pedal is forward. That should make the insertion and removal much easier and preserve stiffness.